Click here to read the full Stumpjumper Expert Evo Carbon review
Same frame, different aim
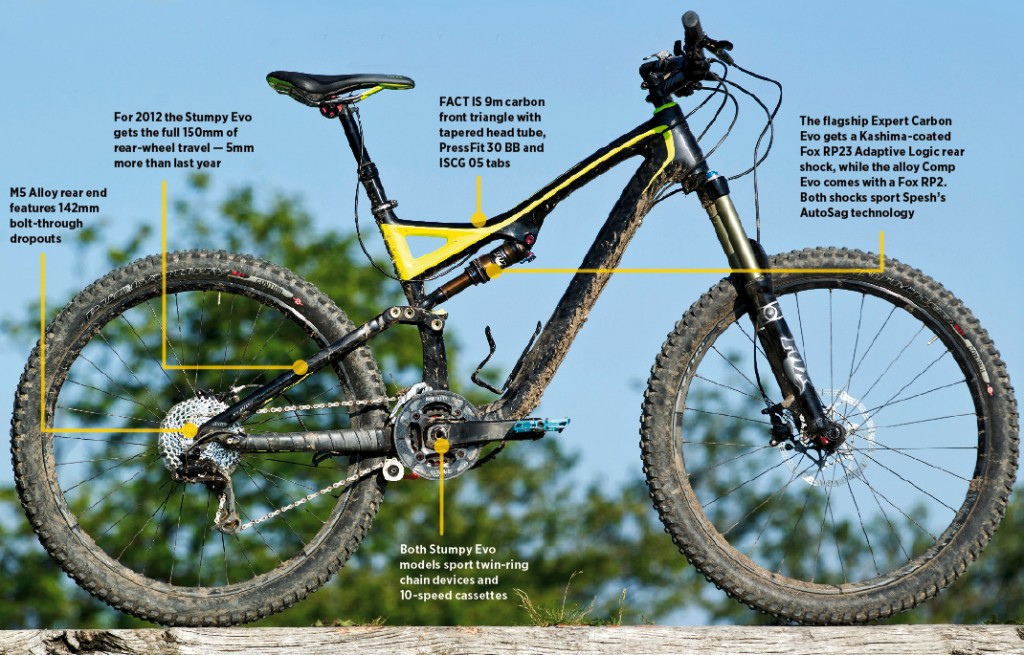
The current Stumpy Evo uses a different alloy frame to the standard one to achieve its geometry and travel tweaks. For 2012, both platforms share the same front and rear triangles, where the dedicated link on the Evo pumps the travel up to 150mm. The different link, combined with the taller 150mm travel fork, also accounts for the changes in geometry. Joining the Expert Carbon Evo is a lower specced full-aluminium Comp Evo.
Mandlebars
No, that’s not a typo. One of the original ideas behind the Evo concept was wider bars and shorter stems, so it’s great to see 720mm bars on all Stumpy FSRs, not just the Evo bikes. We’re also happy about the stem length on the medium Evo being reduced by 10mm to 60mm. Maintaining the Evo theme, the new BlackLite Command Post comes as standard on both Evo bikes.
New rubber
Building on the success of the Butcher DH tyre, Specialized has introduced a mid-compound, single-ply Butcher Control version, specifically for the front end of the Stumpy Evo. Combined with the faster rolling Ground Control on the rear, the tyre spec on the Evo is sorted.
142+
Instead of just putting wider end caps on its 135mm rear hubs, Specialized has redesigned its hub body to make use of the available space offered by the 142mm standard. The bottom line is, wider hub flange spacing makes for a stiffer rear wheel, even if it is only 7mm.
First impressions
The new Stumpy Evo maintains its ‘dispense with the climbs/tear-up the descents’ attitude, but feels more capable than ever. With the revised shock tune, the FSR rear suspension is taut, instead of soft, and the bike definitely pedals better for it. More noticeable however, is the increase in chassis stiffness afforded by the 142mm back end, boosting confidence to new heights. Combined with the specification tweaks, and new tyres it now feels like the finished article. 2012 is going to be a great year for the Stumpy Evo. Fingers crossed the pricing will be equally competitive.
Geometry:
HA: 67°
SA: 69°
BB: 335mm
CS: 420mm
FC: 709mm
WB: 1,129mm
AutoSag
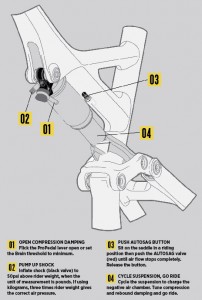
Sag set-up is never straightforward as the desired percentage of sag measured on the rear shock seldom corresponds to wheel travel. Enter Specialized’s new AutoSag technology, with four simple steps to perfect sag every time.
1: OPEN COMPRESSION DAMPING
Flick the ProPedal lever open or set the Brain threshold to minimum
2: PUMP UP SHOCK
Inflate shock (black valve) to 50psi over rider weight, measured in pounds. If using kilograms, three times rider weight gives the correct air pressure.
3: PUSH AUTOSAG BUTTON
Sit on the saddle in a riding position then push the AUTOSAG valve (red) until air
flow stops completely. Release the button.
4: CYCLE SUSPENSION, go ride
Cycle the suspension to charge the negative air chamber and the sag is set. Tune the compression and rebound damping and go ride.
AutoSag really couldn’t be easier, or more accurate. And if you want to run more or less sag than recommend, simply add or remove air from the main shock valve in the usual way. To put Specialized’s latest gadget to the test we used the AutoSag feature on the Stumpy Evo and never had to get the shock pump out after initial set-up. All that’s needed now is a narrower range of rebound adjustment to stop riders straying too far from the optimum setting.


