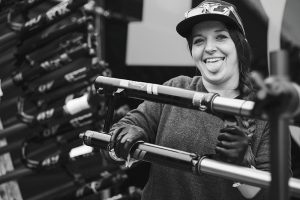
Setting up your suspension needn’t be a scary process, says World Cup mechanic Jules McLean.
Knowing how to set up your bike’s suspension is the first step towards becoming a better rider, because a badly adjusted bike will fight you every step of the way. On the other hand, a good set-up will improve the ride feel and handling, giving a huge boost to your confidence. There’s no escaping that it can be a daunting process though, even for experienced riders. There’s no shortage of complicated, and often conflicting, information out there, and this can make it hard to know where to start. So if you’ve been putting off adjusting the dials and messing about with pressures, here are a few tips to help get you started on the right path.
Read more: Best mountain bike clothing for women – jackets, trousers, shorts, jerseys and more

Use the same pump to check your pressures regularly
Setting sag
The first, and most important, thing to set correctly is sag. Static sag is the amount the suspension compresses under your weight, when you and the bike are stationary. This measurement is used to make sure you have the right amount of air in your suspension – or the correct spring rate if you have a coil fork or shock – so it works properly and allows the tyres to follow the terrain. One common misconception is that if you let air out of your fork it will make it more plush and supple. Without going into the science of how an air spring works, this won’t necessarily be the outcome.
Advice from manufacturers can vary, but I aim for 15-20 per cent sag for the fork and 25-30 per cent sag for the shock. There are lots of good ‘how to’ videos out there, and all you need to get set up is a shock pump.
Rebound
The second thing to set is rebound. The rebound adjuster controls the speed at which the suspension extends after being compressed. Rebound is directly related to air pressure – or spring rate – so a heavier rider will need to use more rebound damping than a lighter rider.
Check the rebound is set correctly by pressing on the handlebars or saddle with open palms, then pulling your hands up quickly. If your hands pull away from the bars or saddle, the rebound is too slow, if they’re pushed out of the way it’s too fast, if everything moves up together it’s just right.
Volume spacers
The main purpose of volume spacers is one thing and one thing only… to control bottom-out. If you’re bottoming out regularly then add a volume spacer. If you’re only using two-thirds of your travel on every ride, remove a volume spacer. It’s that simple.
If you don’t have the tools or experience to do this yourself, your local bike shop will be happy to help.
Compression
The last thing to set is compression, but only once everything else is correct. The compression adjuster controls the speed at which the suspension compresses when you hit a bump or shift your weight. In general, I would use as little compression damping as possible to allow the suspension to move easily. That being said, if it feels like the fork is diving in corners or on steeper terrain, and you’d like a bit more support, add some compression damping.
Low and high speed
If your bike is really fancy, then you may have both low and high-speed options for compression and rebound. In the context of suspension, low speed and high speed doesn’t refer to the speed of the bike, but the speed of the stanchion or shaft. For example, cornering or shifting your weight would cause a low- speed event, whereas hitting a large square-edged rock, or landing off a drop, would cause a high-speed event.
Lighter riders
Although modern suspension is designed with a wide range of adjustments to work for almost all shapes, sizes and styles of rider, there are some exceptions. If you’re really light, and it still feels like your suspension isn’t working as well as it should, you may need a little bit of outside help. A good suspension service centre will adjust your suspension internally, so it performs optimally
for a rider of lighter body weight.
 Who is… Jules McLean?
Jules McLean is a mechanic on the World Cup circuit working for Fox Suspension.


 Who is… Jules McLean?