Modern mountain bikes boast more hidden features than James Bond's Aston Martin. Here's our run down of the most commonly found features you may not know you even had.
If you’ve just bought a new mountain bike, there’s a lot to learn, and not all of it is obvious. In the above video, and the article below, I’m going to show you some key steps and hidden features that can make your riding experience safer, smoother, and a lot more enjoyable.
Older Shimano mechs have the clutch marked, but newer ones may not. If the lever is at 3 o’clock, then the clutch is off.
Mech clutch
Let’s start here with the rear mech, or derailleur. This takes up the slack in the chain and moves it across the different sprockets to change the gear ratio. Most modern mechs have a clutch system in them that keeps the chain tensioned, stops it rattling around, and prevents it from derailing. But if you have a bike with Shimano gears, you’ll need to turn it on by flicking a lever on the knuckle.

That silver button with the red ring around the edge is the cage lock. Rotate the cage forward (anti-clockwise), then push the button in to lock.
Cage lock
At some point you’re going to want to take the rear wheel out. When the time comes, pushing the lever back to the downward position is going to make that job much easier. Flip the bike upside down, change up into the hardest gear, and then you can remove the wheel easily and you’ll know which sprocket to align the chain with when you reinstall the wheel.
If you have a SRAM drivetrain, the clutch doesn’t need to be switched on, but if you want to take the wheel out, there’s a neat little button that makes this easy. Rotate the cage forward and push the button to lock it in place. Now you can remove the wheel without having to force the mech out of the way.

Hidden tool on a Scott Genius axle. Some Trek models also come with this feature.
Axle tool
While we’re talking about removing the rear wheel. Some bikes have tools integrated into their axles. Simply pull the lever out and you can use it to adjust other components on your bike. Like the brake levers, the stem, or the seatpost.

SWAT compartment in stem for multi-tool storage
SWAT tool
And that’s not the only hidden tool you might come across. Some Specialized and Trek bikes come with a mini-tool hidden in the fork. You can also buy these separately and install them on your own bike.

Removable Allen key on an old RockShox fork, but this is still a feature on some entry-level RockShox forks.
Rebound hex key
An even sneakier hidden tool can be found on some RockShox forks – usually lower end models like the Reba and Revelation. Reach under the right leg and you’ll find the rebound damping adjuster. Give it a tug, and you might find the knob comes off with a 2.5mm allen key at the end.

Brake reach adjust
One of the things you can use this for is to adjust the reach on your brake levers. Turn the hex key to move the lever in and out so that it’s within easy reach, and that they don’t pull all the way to the grip before the power comes on.

Bottomless Tokens are included with every new bike fitted with a RockShox fork.
Volume spacers
When you bought your new bike, in the box may have been some weird cylindrical plastic pucks. If you’re wondering what they’re for, they’re called volume spacers and they go inside your fork. You can add them if your air pressure is correct, but you find that you’re always using all the fork travel. Or you can take them out if you’re struggling to get maximum travel – when the rubber o-ring goes all the way to here.
To make a change, make a note of the pressure, let all the air out of the forks, then carefully unscrew the top cap with the correct tool. Add or remove volume spacers, refit the top cap, then inflate the fork again. We’ve got a more detailed guide to installing volume spacers here.

Bleed valves on the lower legs release excess air pressure that builds as the fork heats up on long/rough descents. On RockShox forks, these may need to be unscrewed.
Bleed valves
While we’re on the subject of forks, these little guys at the back of some high end suspension forks are called bleed nipples, or pressure relief valves. Use them to release excess air trapped inside the fork built up over a long descent, or during a hot day.
Presta valve core removal tool
Presta valve tool
Another thing that may have come in the box with your bike is this little tool. It’s called a Presta valve core tool, and it’s used to tighten or loosen the valve on your wheels. Ignore the open end; this is for valve stem extenders used on rims with a deep sidewall, which are mostly found on road bikes. Some of the best tubeless valves come with caps where the tool is integrated into the end.
Schrader adaptor
Presta valves come with plastic caps, but you don’t need them, as dust can’t get into the internals. The valve works by unscrewing the upper locknut and then press the valve down to release any stickiness before attaching the pump. As an added ‘get out of jail free’ card, you can buy valve adaptors very cheaply that convert them to Schrader fitments. This allows you to fill your tyres – carefully – from a car pump or garage air line.
S-clip
While we’re rifling through the contents of a typical new bike box, you’ll sometimes get a little clip shaped like an ‘S’. This is used to clip your cables or hoses together to keep them neat and help reduce noise.

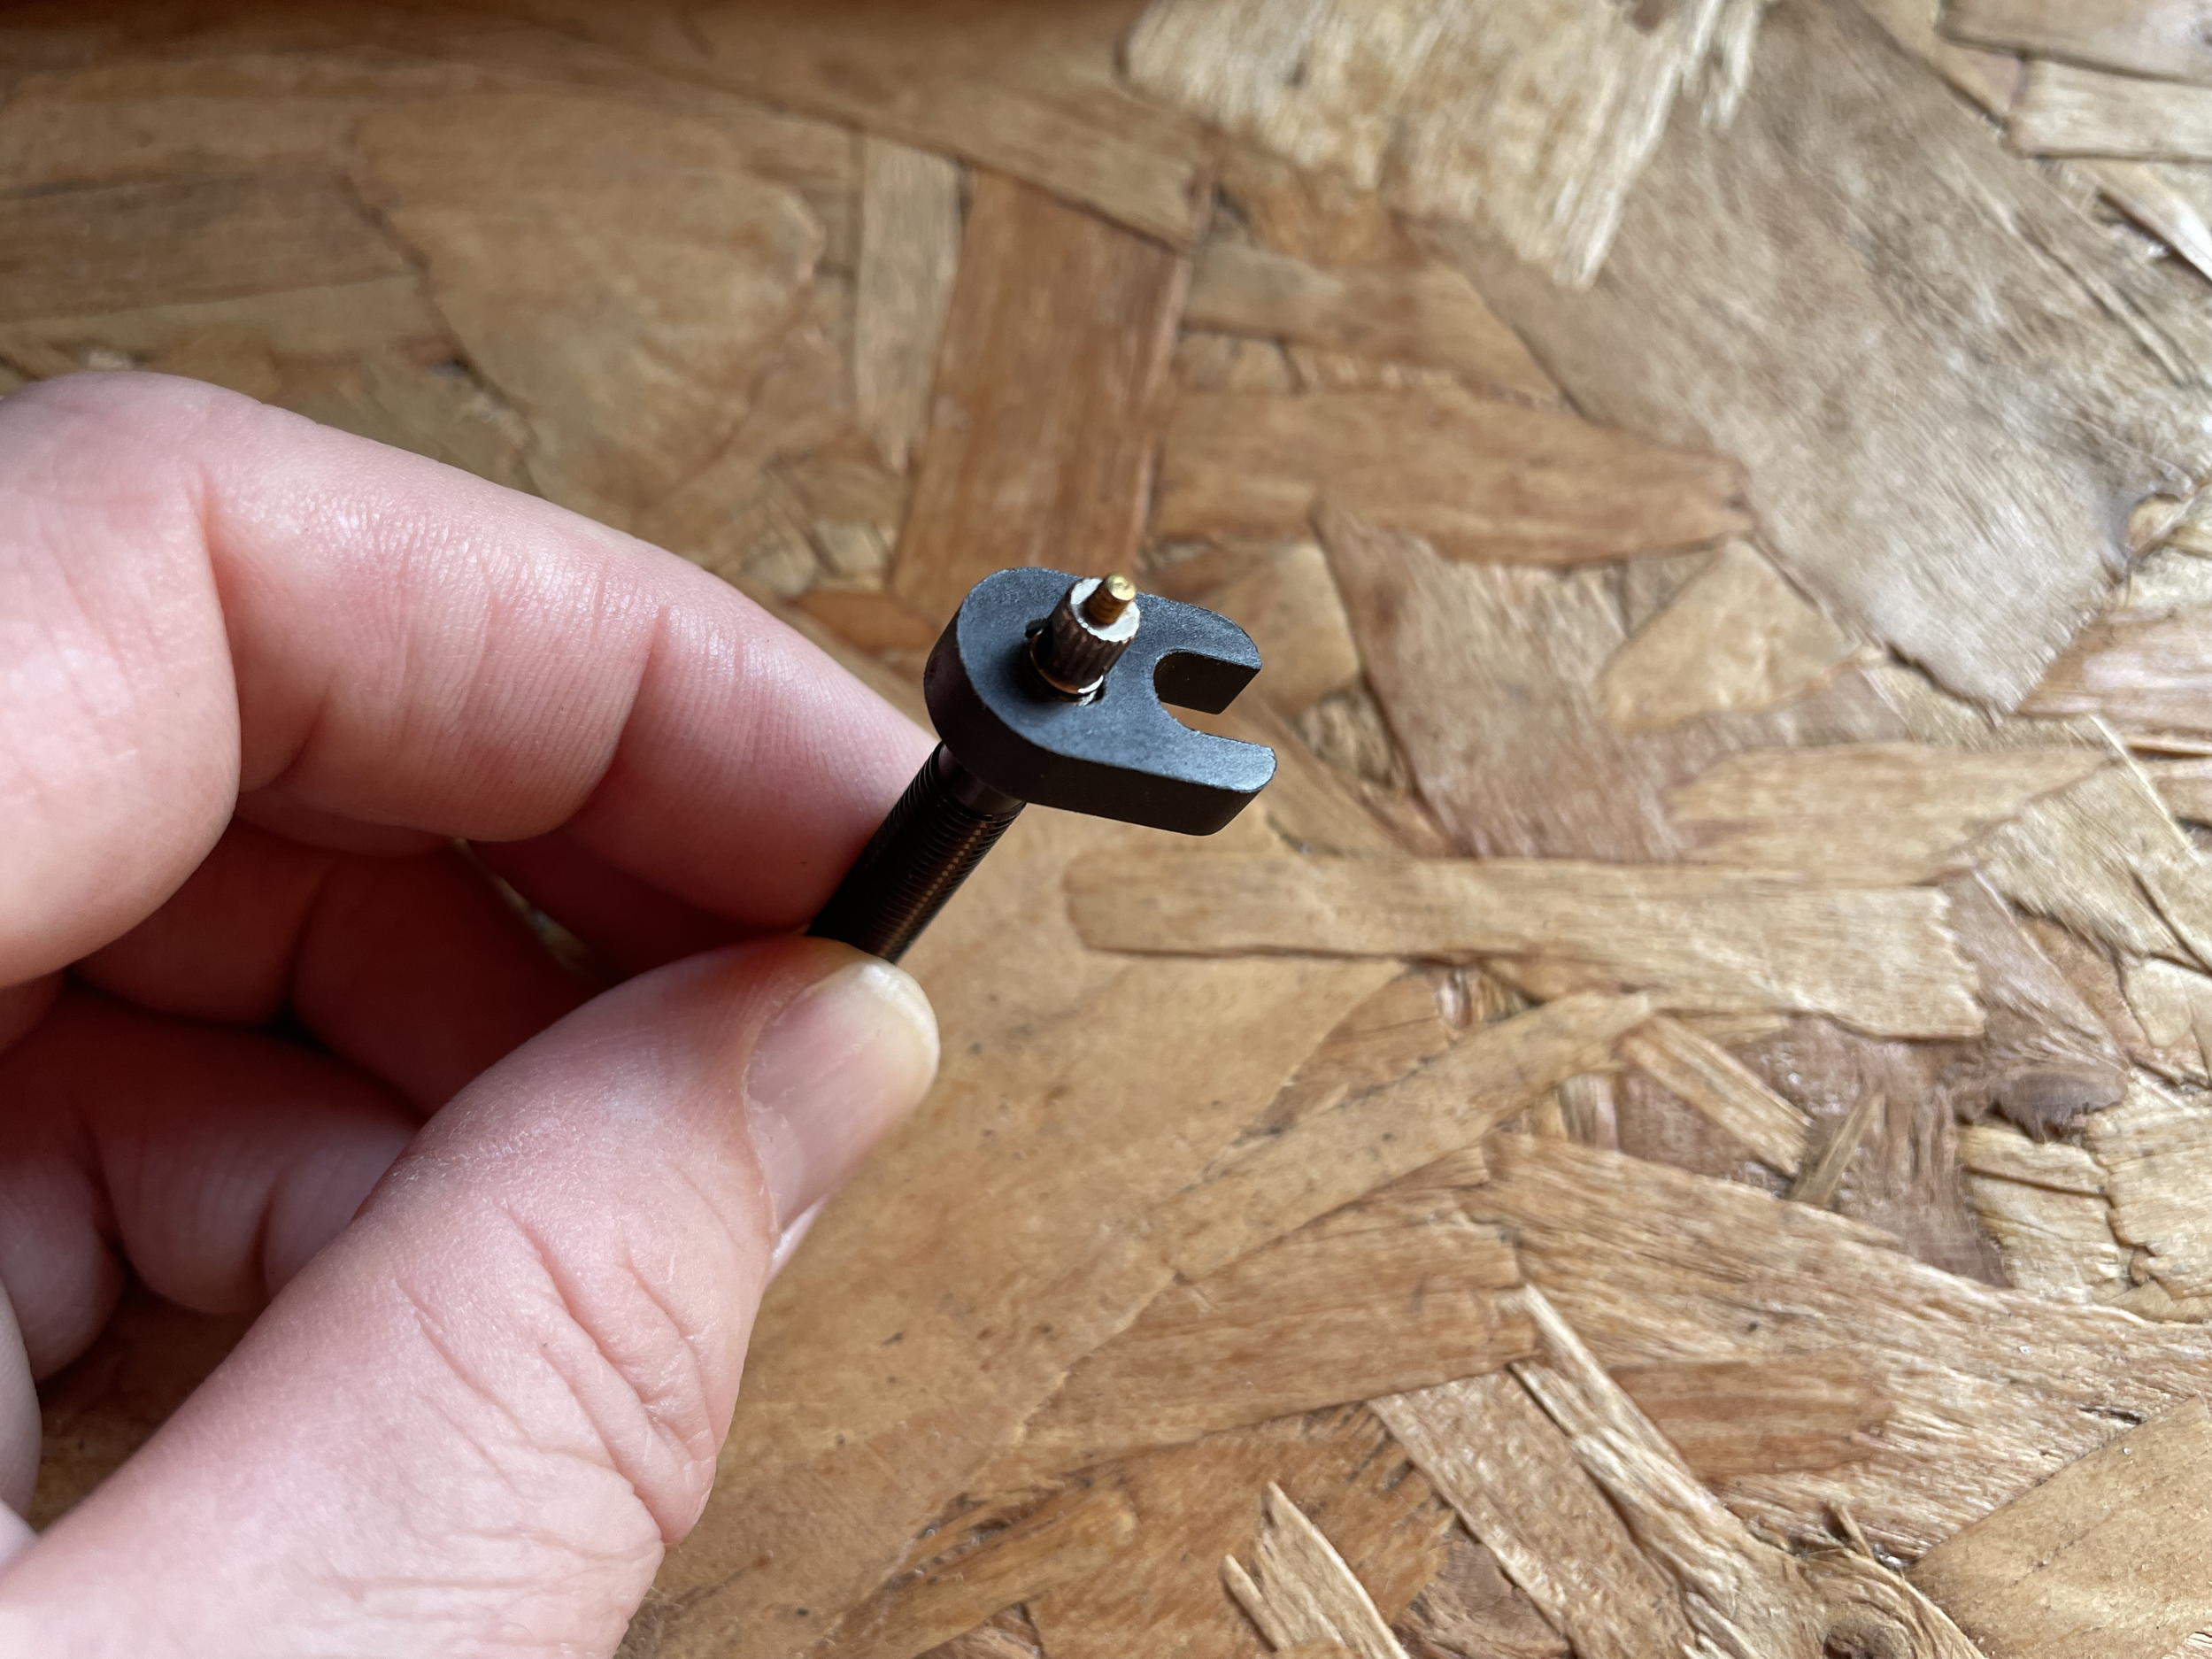
SRAM’s B-Gap adjustment tool should come with every new bike fitted with a SRAM drivetrain.
B-tension
Another tool you might have received is the B-tension tool. This lets you tune the position of the rear mech in relation to the sprockets, and is one of the most common causes of gear issues. While it should have been set correctly from the factory, you can check the alignment to be sure. Shimano has a built-in B-tension guide on its derailleurs. Align the top of the cage marked with the teeth of the cassette in the lowest gear.
The two screws here adjust how far the mech can move in and out, to ensure the chain doesn’t drop into the spokes or between the sprockets and the frame. Once these are set correctly, you can remove the ugly plastic disc behind the cassette. Get rid of the wheel reflectors while you’re at it.
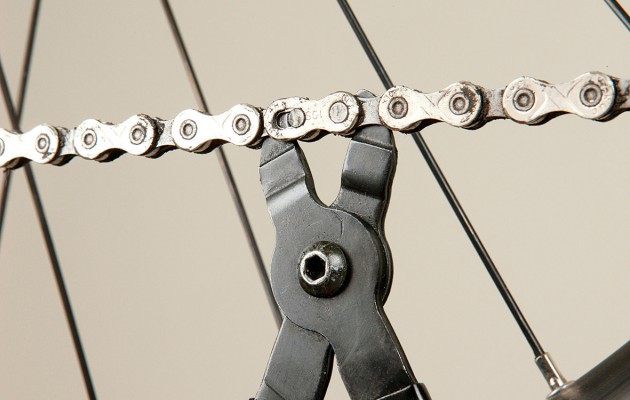
Chain pliers are needed to remove a quick link. You can install them without any tools.
Chain quick link
Modern chains come with a link that can be quickly removed or installed. You’ll need special chain pliers to remove the link. But fitting a new one can be done without a tool. Just assemble the link in the chain in the correct orientation. Pedal the chain around so that the link sits along the top run. Then hold the rear brake on and push down on the pedal. The link will snap into place. Take a spare link and a chain breaker with you on every ride to get you out of trouble if the chain breaks.

Internal down tube storage on a Trek, but loads of brands now offer this on their bikes.
Down tube storage
A great place to store these ‘get me home’ spares and tools are in the frame. Some bikes come with internal down tube storage to let you do just that. There will be some kind of door that opens up to reveal a space inside the frame you can use to carry anything from a spare tube to a lightweight jacket.
Hopefully that’s shed some light on some of the lesser known features on your bike and helped you get it dialled so that your next ride will be even more rad.